Man this has been a pretty great day and I love those kinda days.
First a morning of crafting:
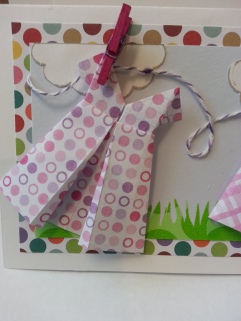
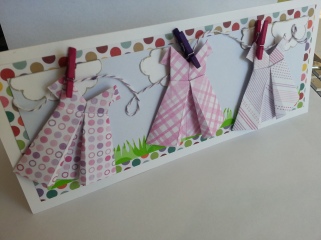
This morning I saw an email that a fellow blogger had commented on my post from last night and so I did what any good blogger does; I went and checked out their blog. I was taken here where I read some pretty interesting posts about the couples adventures in Korea after a month or so, as well as being treated to pictures of some really neat cards. One of the cutest ones had these origami dresses on the front and I thought they were perfect for a baby shower card or a “congrats on your new baby” card. I kept scrolling down skimming through other posts, reading bits here and there when lo an behold she gave a tutorial on making the dresses! Let me just say THANKS Amber! This is one design element I can see myself using many times.
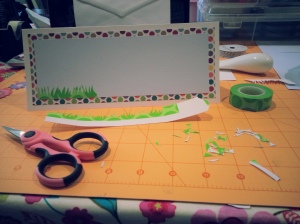
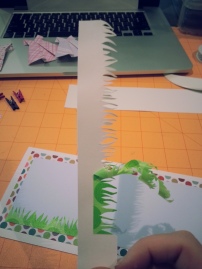
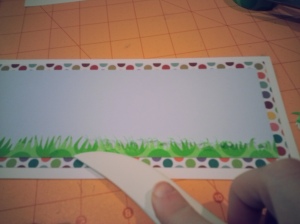
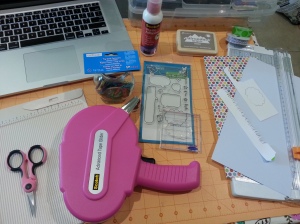
I immediately went into crazy craft lady mode and got to work. The tutorial for the folding was spot on and I had 3 cute little dresses done in no time. Next the decisions about what background to use, other elements/colors and card size. I decided to go with the size from the original inspiration card, but since I know who I am sending this to I wanted to personalize it a bit with colors (plus put my own spin on the original design). I got to work making clouds using a speech bubble stamp from the Lawn Fawn’s Little Birdie Told Me set and a pair of good scissors. Then added grass by cutting green polka dot washi tape into – tedious– grass like shapes (I included pics so you could maybe feel my pain…lol). I lightly stuck the tape to a scrap of white card stock so I could handle it easier.
All in all this is my favorite card that I have created so far. I hope you like it just as much as I do, but even if you don’t…I love it 🙂
Second an afternoon/early evening of cooking and being culinarily creative:
My husband is Turkish and I have come to love many different turkish foods, but one yummy dish always gets me excited for dinner – Lahmacun, or Turkish Pizza as we have come to call it. As a born and bread American I love pizza and over the last 10 years I have branched out to try many different types of interesting ingredients. I have had mexican style pizza with fajita beef, tomatillo sauce and jalapeños, greek with spinach, feta, and olives and even asian style with sriracha, soy sauce and shrimps. When I married Chad I wasn’t a big fan of trying new foods, but after years of watching him scarf down all sorts of different things I have come to love almost everything…no curry..eww…sorry.
Today we decided to make Lahmacun (pronounced Lah-ma-june) and I thought I would share it with all (12 🙂 ) of you who read my little blog.
Lahmacun
2 lbs 85/15 ground beef
2 14 oz cans diced tomatoes
1 big bunch flat or curly parsley
4 small onions (2 really big guys)
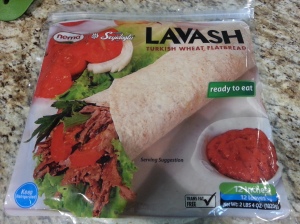
10-12 round Lavash breads or big burrito shells
1/2 cup milk
1/4 cup oil
salt and pepper
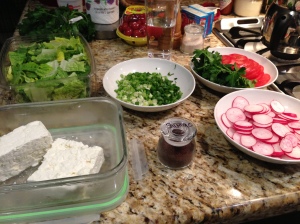
Toppings: feta cheese, lettuce, radishes, green onions, tomatoes, extra parsley (flat or curly doesn’t matter), sumac (optional lemonish flavored spice)
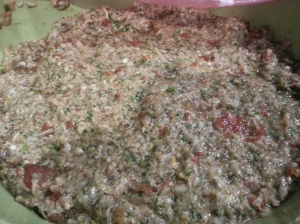
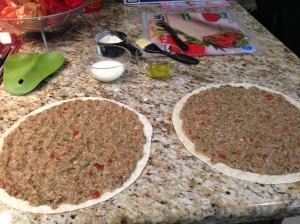
Start by finely mincing the onions and parsley (separately) or chopping them finely in a food processor. Place canned tomatoes, minced onion, parsley, and burger in a big bowl and mix well (we are not making hamburgers…don’t be afraid to really go at it). Add salt and pepper to taste (you could taste the mixture in its raw form like my husband does…if your really brave). Don’t worry if it seems really moist, it is supposed to be.This mixture should look like the picture below:
Then start your oven to 500 degrees and put the meat aside to let the flavors meld. Slice your toppings and set aside. Once your meat has rested for 10-15 minutes and your oven is good and hot make a space on the counter to assemble the pizzas.
Brush the center of each flatbread with milk (why I don’t know, but this is what he does) and the edge lightly with oil.
Place a good handful of the meat mixture in the center and spread around. You want the meat layer to be about 1/4 of an inch thick. If it’s too thick it doesn’t cook before the flatbread burns, but if its too thin it dries out before the flatbread even cooks.
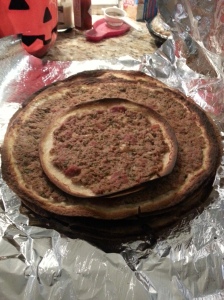
Place on a pizza pan that has lots of little holes in the bottom or directly on your bottom oven rack and monitor…do not walk away. If they don’t fit on the rack together you will have to rotate them half way through. Cook 6-8 minutes or until the edges are well done (I say they are burned, but Chad says that it the way its supposed to be…) and the meat is cooked.
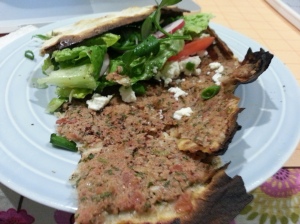
When they are done we stack them together in a big piece of foil to keep warm until there is enough for everyone to eat, or you could just serve a few at a time. Pile high with toppings of your choice, roll up like a burrito and enjoy.
Happy Sunday!!
Mar 05, 2013 @ 19:44:58
Thank you for your kind words on my blog post with the Pencil Poinsettias! Your dresses are so very cute, but I have to say, you are much more adventuresome in the kitchen than me! 🙂 Have a great day!!